

Overview
For soil-based and lower-tech farms without an existing process controller, DripPilot operates as a fully standalone package. We provide an irrigation hardware bundle that directly actuates your irrigation system, with no third-party controller integration required.
Required Hardware
The DripPilot system requires the following hardware components for a complete installation:


Connectivity Requirements
- Internet connection (broadband or 4G/LTE) for cloud-based AI processing
- Local network access for the RevPi controller to communicate with the Koidra Hub
- LoRaWAN or a compatible wireless protocol supported by the wireless converter for sensor communication
Hardware Installation Steps
Installation of DripPilot involves mounting physical hardware and making electrical connections, placing sensors, configuring the network, and onboarding software through the Koidra Hub. Installation should be performed by a qualified technician or with guidance from your provider.
-
- Mount the RevPi Connect 5 and RevPi digital I/O expansion module in the control cabinet, connected via the PiBridge.
- Wire the digital inputs (DI) to your irrigation valve sensors and digital outputs (DO) to your irrigation actuators.
- Connect the RevPi controller to your local network and ensure internet access.
After completing the hardware installation, go to http://app.koidra.ai/register to create your account.
Once logged in to the Koidra Portal, open the Help Center from the bottom-left corner and select the  DripPilot user manual to get started.
Appendix
Irrigation Process Flow Diagram

Irrigation Cycle Steps
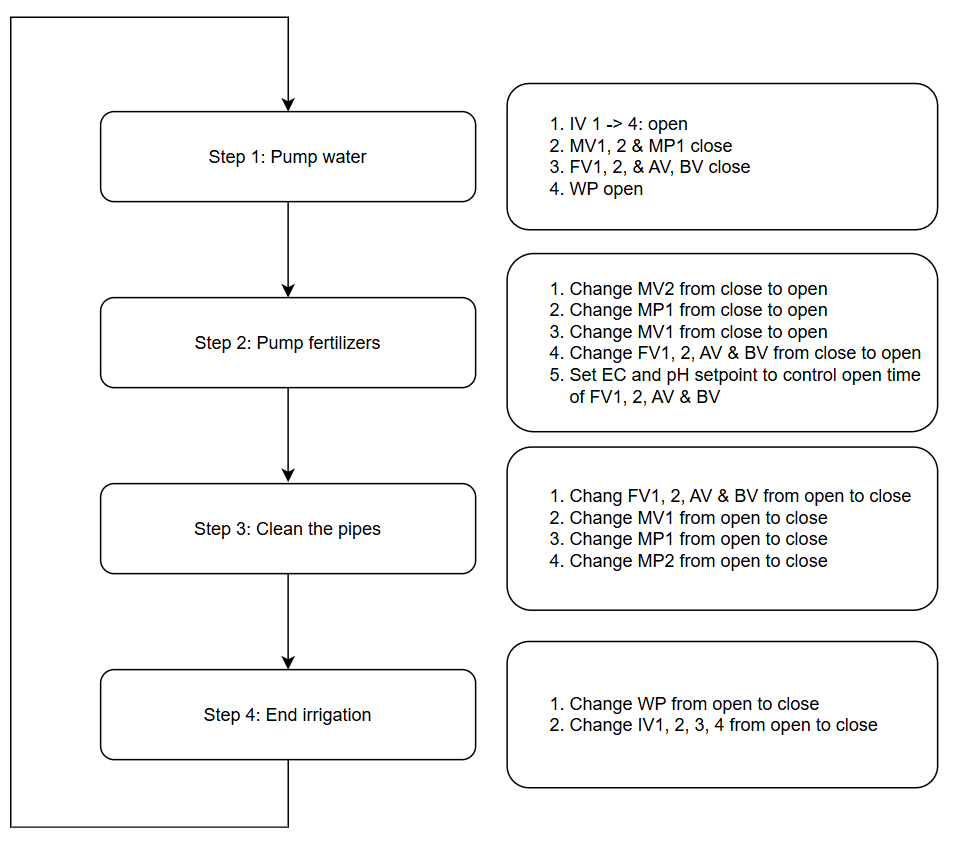
Irrigation Interlock Control Diagram

Power Connection Diagram

Input/Output Wiring
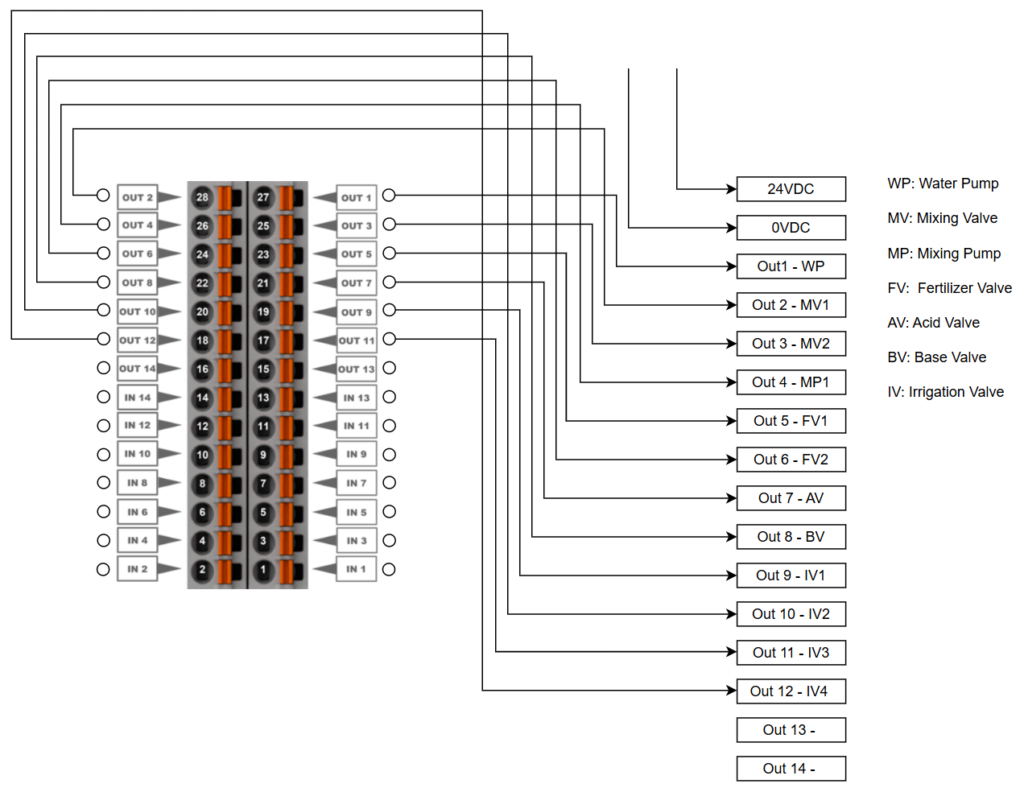
Demonstration of a Complete RevPi Installation with the Expansion Module
